Monday, March 12, 2012
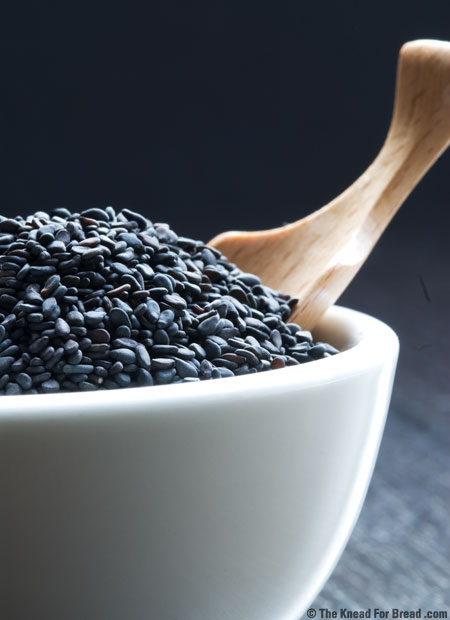
Black Sesame Noodles
Tonight I wanted to try a recipe from my newest cookbook: A Year In a Vegetarian Kitchen by Jack Bishop (Thanks Stacey & Austin for introducing us!). So I decided to try to make Black Sesame Noodles. It was deeeee-licious. Not too many changes, but a few Lora Dever touches here and there...!
Black Sesame Sauce
1/4 cup black sesame seeds
1/4 cup smooth natural peanut butter
2 medium garlic cloves
1 tablespoon grated fresh gingerroot
1 tablespoon sugar
1/4- 1/2 tsp crushed red pepper flakes
1/4 cup hot water
1/8 cup tamari (or 1/4 cup soy)
2 tablespoons rice wine vinegar
For Pasta:
Salt
linguine
1/2 medium cucumber, peeled and grated through a box grater
1-2 medium carrots, peeled and grated
3-4 medium radishes, grated
Diced red pepper
chopped fresh cilantro leaves
1 teaspoon toasted black sesame seeds (reserved from 1/4 cup, above)
Directions:
1. For pasta: Bring water to a boil in a large pot and salt generously
2. For the sauce: toast the seeds for a few minutes over medium heat, stirring, careful not to burn. Reserve 1 teaspoon of the seeds. Pour all the sauce ingredients into a food processor or blender. Blend until smooth.
3. Cook pasta until al dente. Drain and toss with the sesame sauce. Add cucumber, carrot, pepper, and radish. Salt, and top with reserved sesame seeds and cilantro.
I used the extra sauce for baked tofu, which made for an excellent marinade!!! Ryan paired it with some pork dumplings from a local chinese restaurant, also a super tasty idea!
Saturday, March 10, 2012
Happy Anniversary: 2 years of Green Eating!
I wanted to take a moment to celebrate my 2nd anniversary of veggie-dom! It's been a pretty awesome year, with lots of new delicious veggie recipes making their way onto the blog, and mastering nutrition in the dead of winter. I can't believe my one month experiment has turned into such a comfortable lifestyle, but the more I know, the more I stand by my decision! It's been perhaps a strange coincidence that since I turned veg, I've made four really close friends who are veggies too, and some days it seems like we will soon rule the world.
Even Ryan, initially the most meat-and-potatoes-man on earth, now eats veg 3-4 nights a week. Perhaps he's just gotten lazy. Maybe it has to do with our grill running out of gas. But I think the cute baby pig argument is also finally getting to him. Big Softee.
Even my family seems to be trending toward 'less meat', and kudos to them. Who needs to eat adorable farm animals anyway!?!
Can't wait to try some more recipes in year 3... ! Stay tuned!!
Tuesday, March 6, 2012
Stuffed Poblano Peppers
This recipe is from my dad and stepmom, vis a vis Martha Stewart. I've made almost no changes- except to perhaps shake slightly more cumin on top, and leave some seeds in to kick up the spice. I've also paired it with a nice salad. Oh yes, and heed the warning below!!
Ingredients:
1 can(s) (28-ounce) whole tomatoes in puree
1 jalapeño chile, seeds in for heat, seeds out for a little less
2 small onions, chopped
3 clove(s) garlic, 2 whole, 1 minced
Coarse salt
Ground pepper
1 can(s) (19-ounce) black beans, rinsed and drained
1/2 cup(s) yellow cornmeal
1 cup(s) shredded pepper Jack cheese
A really good shake of ground cumin
Handful of Cilantro leaves, garnish
sour cream, garnish, optional
4 large poblano chiles, halved lengthwise, stems left intact (for pretty, if you want), ribs and seeds removed
**** DO NOT TOUCH PEPPERS WITH YOUR HANDS --- YOU WILL DIE***** NO, REALLY. Put on gloves, or use sandwich bags- try not to touch the seeds. No amount of scrubbing will get the burn off your fingers- and then you will touch your eye, or nose, or mouth... and no bueno. You have been warned!
Directions
Preheat oven to 425 degrees.
In a blender, combine tomatoes in puree, jalapeño, half the onions, and 2 whole garlic cloves; puree. Season with salt.
Pour 3/4 of the sauce into a 9-by-13-inch baking dish; set aside.
In a medium bowl, combine beans, cornmeal, 1/2 cup cheese, remaining onions, minced garlic, cumin, and 3/4 cup water; season with salt and pepper.
Dividing evenly, stuff poblano halves with bean mixture; place on top of sauce in baking dish.
Sprinkle poblanos with remaining 1/2 cup cheese; cover baking dish tightly with aluminum foil.
Bake until poblanos are tender, about 45 minutes.
Uncover, and continue to cook until sauce is thickened slightly and cheese is browned, 10 to 15 minutes more. Let cool 10 minutes.
Garnish as desired and serve with yellow rice and avocado or mixed green salad with a cilantro-lime vinaigrette!!
Thursday, March 1, 2012
Baked Haddock
Ryan and I loved the flaky, tasty, and light piece of fish this recipe created. But we didn't love the way our house smelled afterwards. I'd recommend making it on a day with the windows open, OR, as I discovered, have a batch of brownies ready to go in the oven to clear the air!!
Ingredients:
3/4 cup milk
2 teaspoons salt
3/4 cup bread crumbs
1/4 cup grated Parmesan cheese
1/4 teaspoon ground dried thyme
1-2 haddock fillets
1/4 cup butter, melted
Directions
Preheat oven to 500 degrees F (260 degrees C).
In a small bowl, combine the milk and salt. In a separate bowl, mix together the bread crumbs, Parmesan cheese, and thyme. Dip the haddock fillets in the milk, then press into the crumb mixture to coat. Place haddock fillets in a glass baking dish, and drizzle with melted butter.
Bake on the top rack of the preheated oven until the fish flakes easily, about 15 minutes.
Wednesday, February 15, 2012
Linguine with Sage-Walnut Butter and Herbed Ricotta
The best meals in our house start with really inspiring raw ingredients. And this dish was born from opening the fridge and going: oh my god, how do I get that into my mouth??? and... I want to eat that- Right now! I also have to say, it is one of the few dishes that is truly an amalgam recipe- it is partly based on a recipe from the cookbook 'A Year in the Vegetarian Kitchen', partly based on a recipe from the internet- and partly based on my own sense of what would be tasty.
Ingredients
1 1/2 cups fresh, not that polly-o shiz, real-deal Ricotta
3/4 box Linguine (or make your own... that would be excellent)
Rosemary, chopped
Basil Leave
Sage Leaves, chopped
Parsley, chopped
olive oil
salt and pepper
parmesan cheese
carmelized onions (if you have some lying around... as I was lucky enough to!) or a shallot
garlic- a few cloves (poached, or raw)
1/2 stick butter
chopped walnuts
lemon
Directions
1. Drain the ricotta in a sieve in the sink. Let sit for a while.
2. Prep every fresh herb you can find in your kitchen- I think I omitted the basil, but added chive, and thyme to the mix- and chop them as finely as you can. Mix the herbs into the ricotta cheese, and salt and pepper the cheese to taste. Grate some parmesan cheese into the ricotta, and mix in. Set aside. Try not to eat all of it while you cook. Save a few sage leaves for later.
3. Put the water for the pasta on to boil. Salt it well.
4. While the pasta water boils, either smash the poached garlic in the bottom of a skillet with some olive oil, OR sweat the raw shallot and garlic over low heat in the olive oil for as long as you can stand it, and until they are very fragrant and translucent.
5. Then, melt the butter in the skillet over medium heat. When the butter is fragrant, add the remaining sage and walnuts to the butter, and continue cooking it until it smells incredible. Splash some lemon on it.
6. Drain the pasta, reserving the water. Add the pasta to the skillet with the butter sauce, adding some pasta water to moisten as needed, and stir to coat. If using carmelized onion, mix those in at the last minute. Taste and adjust seasonings as needed.
7. Serve the pasta in the sauce with a large dollop of the herbed ricotta on top.
Sunday, February 5, 2012
Pasta Class!
In my journey to make everything from scratch, handmade pasta was my next step. And the lovely and fantastic Ronna Welsh of Purple Kale Kitchenworks was on hand last Saturday- along with our good friends, Kristen and Craig, to show us how it's done.
#1: Making the dough
Ronna introduced us to italian Double 00 flour- which creates a better texture than traditional 'all purpose'.
Ingredients: 2 1/4 cups of flour and 3 large eggs.
The Technique:
On a dry, lightly floured cutting board, scoop (do not pack down the flour or shake to settle- it's all good to let it stay fluffy in the cup) the flour into the center. Make a well with nice high walls and crack the eggs into the middle.
Begin to slowly and lightly beat the eggs, and then start to incorporate the flour into the egg. Continue to do this until the dough is just barely a solid, and then abandon the fork and finish adding in the flour by hand, using a kneading motion. Ronna explains this as using the palm, rather than fingers, and a press, followed by a pick up and turn. Once the flour is no longer combining with the egg, scrape all the remaining flour off the cutting board as well as your hands- this will not incorporate into the ball and will ruin the texture- and then get ready to work hard- kneading !!
#2:Knead the dough
This is about a 10 minute process. Lightly flour the surface and your hands, and continue with the same kneading motion used above. Ronna recommended adding a lunge into it- but prepare for a workout, no matter how you approach it. Keep kneading until the dough is soft and workable!!
Rest the dough
Wrap the dough in saran wrap and set aside for 30-60 minutes and use this time to make some fillings and prep ingredients for sauces and sides.
Fillings & Sauces:
We made several delicious fillings- braised leeks, carmelized onion, seared trumpet mushroom, fresh ricotta, and poached garlic. We also reduced some heavy cream in preparation for a cream sauce.
In the future I'd love to try some sauteed spinach and ricotta, or beets for fillings, but really, the possibilities are endless!!
Stretch the dough
When you're ready, it's time to stretch the dough. This is where a little hand-crank pasta machine is going to come in handy. According to Dean & Deluca and Vecchia Nonnas everywhere, it is possible to keep on by hand and use a rolling pin, but the machine helps to process the batches a bit more quickly- once Kristen & I got the hang of it, we were able to process the whole batch in about 20 minutes.
Begin by using the rolling pin to flatten out the ball into a round. Cut it into 4 pieces, wrap 3 of them tightly in saran wrap. Begin by folding the first piece into 3 parts, like an envelope, and pass it through the machine at least 3 times on the widest setting.
Then, pass the piece through two times on each setting, from 1-6. Then repeat the process, folding it back into an envelope and starting on setting 2 or 3, and passing it through once per setting. Once it is silky smooth to the touch, you are ready to make some pasta!! Wrap the pressed pasta if not cutting immediately into shapes.
Make Pasta!
We used cookie cutters to create raviolis, and we pinched pockets for tortellini, too.
Craig was the master pasta-maker, making tortellini's like he was born to do it, and cutting pappardelle ribbons by hand!
We finished the pasta in a braised leek and butter sauce and sampled our creation!
A very busy, delicious, and productive day!!
Sunday, January 29, 2012
Apple Crisp
Sometimes, I just want an easy, tasty dessert! And the last two weekends, when it is cold and snowy, this one is just right!!
4-6 medium size apples, cut into slices any kind good for baking
1/2 stick of butter
3/4 cup flour
1/4 cup brown sugar
1/2 cup white sugar
1/2 tsp salt
1 1/2 tsp cinnamon
Preheat oven to 375 degrees.
Layer the sliced apple into a baking dish. In a bowl, mix the flour, sugar, salt, cinnamon, and half of the butter. Sprinkle the crumble on top. Cut up the rest of the butter and put on top. Bake for about 50 minutes, until topping browns and crisps!
Subscribe to:
Posts (Atom)


